Category Archives: MS Word

Symbols and special characters quickly, easily, and accurately

rendered three-dimensional symbol of e-mail

If you’ve edited or written docs with lots of special characters—let’s say a paper in biochemistry with lots of microgram symbols, µg, and temperatures in °C—or a paper with foreign-language words with lots of accented characters, even just number ranges with en-dashes, 1969–1978, or em-dashes in sentences, as above, you know how it can drag on your time and concentration to have to drop down a symbol menu, hunt for what you need, and select it with the mouse. When you have to do this repeatedly, either by continually menu-searching and mouse-clicking or by copying and pasting, it can get to be a real pain. Not to mention the very real possibility that your “ƒ” will show up as a “¢” or even just a mysterious box or empty underlined space in someone else’s program. I have also edited papers originally typed in Asian versions of Word where symbols were in a different font, usually “Batang” or “Gulim,” that created unsightly and inconsistent spaces between lines of text to accommodate the different typeface of one symbol. Sometimes these are even just quotation marks. (Tip: to reveal the source of a mysterious space between lines, try holding down the shift key while using the arrow key to highlight the lines of text. Watch the font name in the menu bar. When the name goes blank or changes to something else, you have just found your culprit. Use the arrow key to go letter by letter to pinpoint it, then change the font to match the font of your text.)

Keyboard shortcuts to commands and special characters are always a time saver. Every text and word-processing program, even HTML (with inclusion of a couple of tags), PDF comment and text replacement boxes, and fillable Web forms, has ASCII symbol capability, and universal, error-free, consistent, generic symbols compatible with every font are no further away than the number keypad on your keyboard.

To access the symbols, make sure your Num Lock key is turned on. Open Word, WordPerfect, OpenOffice Writer, even Excel, Notepad, or a new e-mail message. Type v-o-i-l- Alt-0224—voilà! (This works only with the keypad, not with the numbers in the top row of keys, by the way.) Now try Alt-0163—instant £ !

Two sets of symbols have been developed in conjunction with the Alt key; one uses three numbers, the other uses four (always beginning with zero). A brief search on the Web for ASCII symbols (try the search string < ascii symbol alt number > for a useful list of sites) will reveal more than several sites offering charts of the available symbols. Print out your favorite charts, one for each of the two sets, and keep it handy. You never know when you might need a Ĝ or ± or ™, and you won’t want to waste time and energy trying to find it in a drop-down symbol menu that might not even be the same as another user’s.

Let Word Do the Work for You!

Microsoft Word

Okay, let’s see…I need to check for:

  • Correct spelling and grammar
  • Run-on sentences
  • Having commas and periods on the inside of quotation marks

Users of Microsoft Word all know about spell check, and many of us are also acquainted with grammar check. But this software can check for so many common errors—if you have it set up to do so.

Some other useful features include searching your document for:

  • Serial commas (you can choose to have them or not, depending on the style manual your paper uses)
  • Clichés, colloquialisms, and jargon
  • Having the same amount of spaces at the start of each sentence (you can opt for either 1 or 2 spaces)
  • Passive sentences
  • Wordiness
  • Split infinitives
  • Unclear phrasing

There are many more features available, which you can check or uncheck, depending on your preferences. Once you know your professor’s specifications, you can tell Word how to help you. Here’s how, on Word 2003. With Word open:

  1. Go to Tools
  2. Select Options
  3. Click on the Spelling & Grammar tab
  4. Click on Settings
  5. Next to Writing Style, choose Grammar & Style
  6. Check the items you want and uncheck those you do not want Word to look for

Here’s how to access this is Word 2007. With Word open:

  1. Click the Office button
  2. Click on Word Options
  3. Select Proofing
  4. Next to Writing Style, choose Grammar and Style
  5. Check the items you want and uncheck those you do not want Word to look for

Will all this help? Yes. One very helpful feature is checking for passive voice. Some professors (maybe yours) can be a real stickler about that.

Is it perfect? Yeah, right. This is technology we’re talking about—very useful, but undeniably brainless. With this in mind, be sure to check your document yourself, as any software can miss things.

That’s the Breaks

That's the Breaks

As an editor, I’ve seen plenty of papers with pages that were separated by the writer hitting the enter key as many times as necessary to put the cursor on a new page. When this is done, it looks fine—until the writer later makes changes to the document. Then what happens is that there are suddenly all these spaces, but now they’re in the wrong place. So, delete delete delete here and enter enter enter enter enter enter enter enter there—and the whole process starts all over.

There’s a much better way for getting to the next page in your document: use the Break feature in MS Word. Actually, several possibilities exist for adding a break to your paper. We will discuss the two most commonly used: page break and section break.

Page break:
This feature is fantastic (and very easy). Let’s say you’ve just written the abstract for your essay. Generally, abstracts are short—often less than half a page. So, when you start your actual paper, you’ll want to have it begin on the next page. But instead of hitting the enter key 10 or 15 times, let’s use the page break feature. Here’s how:

  1. Go to Insert
  2. Select Break
  3. Select Page break

When you do this, your cursor will jump straight to the beginning of the next page, which is right where you want it.

Section break:
Breaking up a document into sections, by using the section break feature, is a powerful word processing tool. You can format different sections in different ways. For example, in the introductory portion of your paper, you may want to use lower case Roman numerals. Then, in the main body of the paper, you want to start the numbering over and use standard Arabic numerals. No problem:

  1. Go to Insert
  2. Select Break
  3. Select Section break

Do this for the first section, and then do it again (wherever and for as many times as you choose) to create a new section. There are also different types of sections you can create; the Help feature (and some experimentation) can tell you more.

Information, Please

Information, Please

In the Information Age, it’s almost quaint to use a paper dictionary. It’s so much simpler to access information almost instantaneously from one’s computer, whether from the Internet or software programs such as Microsoft Word. If you’re not yet acquainted with such resources, here are a few tips for getting started.

Remember that in MS Word, you have access to a dictionary, thesaurus, and reference books—if you’re online. To get to them, just highlight a word or phrase, and then right click and press k. Or, you can go to Tools and select Research. Then, from the Search for list, you can select a reference book or (again, if you’re connected to the Internet) a reference website.

Even if you don’t have MS Word, and you’re using some other means to write your essay, help is available. Here are some of the most useful resources:

Google:
(Well, duh.) In addition to its obvious use a premier search engine, you can find images, news, video, maps, and much more.

Answers.com:
This is a very nice, kind of all-inclusive site. You can type in a word, term, or phrase and get all the information you want. It will also offer you links to more or related information about what you’re searching for.

M-W.com
The site of Merriam-Webster (the dictionary writers). Look up any word or phrase to get the origin, pronunciation, and meaning. A thesaurus is also available.

What do you do if you don’t have Internet access? Well, you can always go to wherever you happened to see this blog, assuming you’re not just reading a printed-out version.

Seriously, though, there are some options available in case you don’t have ready Internet access. If you’re a student, your school will almost certainly have a computer lab you can use. Otherwise, the public library is a wonderful, free resource—and they even have paper dictionaries for those who want them.

Customizing AutoCorrect

Customizing AutoCorrect

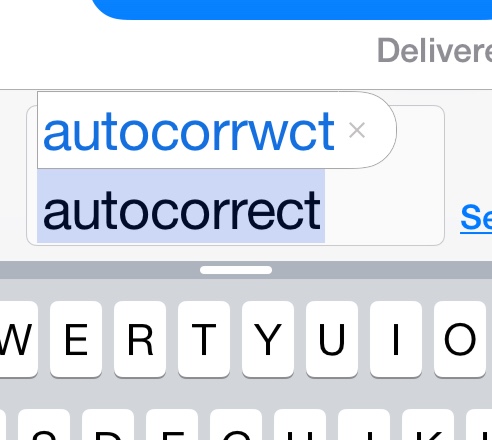
Microsoft Word has some of the most amazing features. Writers of yesteryear could only dream of having your spelling and grammar mistakes pointed out as you type. Now, however, MS Word does that, and even corrects some mistakes automatically (such as changing didnt to didn’t, i to I, etc.).

Most MS Word users are already familiar with the red or green squiggly lines that appear, respectively, underneath (perceived) spelling and grammar mistakes. And the Autocorrect feature mentioned above is also pretty well-known. But there are some neat little tricks that not every Word user is aware of. These include customizing Autocorrect.

As mentioned above, MS Word automatically corrects common errors, changing typos such as alwasy and alwats to always. But did you know that you can add your own Autocorrect words?

Here’s an example. Unless you’re writing a very scholarly paper, you’re unlikely to use the word cant (cant means jargon). So, you can “train” your Autocorrect to recognize the fact that you have a habit of forgetting to put the apostrophe in can’t. Here’s how.

  1. With your Word document open, go to Tools
  2. Select AutoCorrect Options
  3. Choose the AutoCorrect tab (you’ll probably already be there)
  4. Where it says “Replace:” write cant
  5. Where it says “With:” write can’t

Then, every time you write cant, Word knows you really meant to write can’t, and will automatically correct this for you.

You need to be careful with this, however. For example, if you set AutoCorrect to replace every instance of mildew with milder, and there comes a time when you actually want to write mildew, it will try to AutoCorrect it to read milder. And then it’ll sound pretty strange when your sentence reads something like, “The new tenants liked the house, until they found its milder.”

So, make AutoCorrect do what you want it to. Select your own AutoCorrect choices—but be careful.